Chow Chow peel thogaiyal

I have always observed that the skin of every vegetable or fruit is enriched in vitamins and proteins and helps in the cure of many ailments. And that is the reason I love the way our ancestors have incorporated the peels into our cooking in many ways. The best way is a thogaiyal (chutney) which can be made spicy and tangy to satisfy the taste buds.

Chow chow aka seemai kathrikkai is what we call this ChayoteFor starters, chayote contains no cholesterol and unhealthy fats, and is usually recommended for controlling bad cholesterol levels and promoting healthy weight. Furthermore, chayote is a rich source of dietary fibermagnesiumphosphoruspotassiumvitamin C.

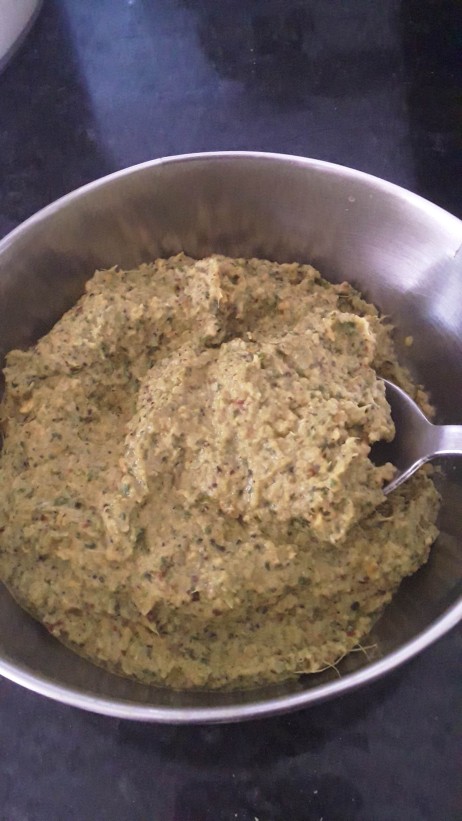
So, here is a simple yet delicious chow chow peel thogaiyal which is great on bread toast, chapatis and hot rice too!

Chow chow peels – peels from 2 small size chow chow
Coriander – one handful
Mint leaves – one handful
Tamarind – size of a small gooseberry

In a pan, fry the above said ingredients in a tsp of oil, by adding the required salt. Adding salt will help the peels to become soft and cook fast. Remove from heat and allow it to cool.

Red chillies – 2 nos
Urad dal – 1 heaped tablespoon
Pepper – 1 tsp
Mustard – 1/4tsp
Hing (Asafoetida) – the size of a peanut

In a pan, add a tsp of oil, fry the asafoetida bar first, add the mustard, let it crackle, then add the other ingredients and fry them on medium heat till the dal turns golden in color. Remove from heat and cool it.

20190425_075904

After it cools down, take a blender and grind the peels and tamarind along with red chillies and hing to a fine paste. Now add the fried dals and pepper and use the whip button of the blender so that the thogaiyal is coarse to feel, which will give a nice crunch while eating.

20190425_083423

Vengaya thogaiyal

The best part about my apartment is that the corridors are long and walking it up and down a few times will make up for the daily exercise. Also, I get a chance to meet my fellow floor-mates and maybe inhale the fragrance of cooking that wafts into the corridor.

Those fragrances will inspire me to cook a long forgotten dish or just tempt my palate so much that it becomes a consistent craving. And all thoughts are lost till the time the dish is cooked and eaten and finished with a burp!

Yesterday’s walk by the corridor was very fruitful that way as I met my little girl friends who hugged me tight with a “Miss you” which just warmed my heart! My nostrils tingled with the smell of fried onions and urid dal, as I hugged the little girls – something was cooking in their kitchen by their paati. I just knew it…vengaya thogaiyal.

I had to make it today.

So here it is…the recipe of vengaya thogaiyal as I made it today!

Onions – 3 nos medium size – chopped into cubes
Mint leaves & coriander leaves – a handful of each
Tamarind – the size of a small gooseberry

  • Fry the above said in a one tsp of oil with the required amount  of salt and keep them separately, to cool.

    Prep for the thogaiyal

Red chillies – 2 nos
Urid dal – 1 heaped tablespoon
Pepper – 1 tsp
Mustard – 1/2 tsp

  • Add a tsp of oil to a pan, add mustard. After it crackles, add the chillies, urid dal and pepper and fry them till the dal turns golden brown and keep them separately to cool.
  • After it cools, grind the onions, red chillies, tamarind first to a nice paste.
  • Then, add the urid dal and pepper and grind to a coarse paste.
  • Vengaya thogaiyal was relished today with wheat rava upma.

Vazhakkai podimas

Vazhakkai aka raw banana is one of the fav vegetable at home because of its ability to be made into a fried version; and at this point we ascertain our unfathomable loyalty to anything prepared in oil.

To break this oily comfortness, vazhakkai is made into a podimas version at home which is even more comforting on the palette.

Make sure to buy fully grown raw bananas and not the tender ones.

Take one vazhakkai and cut into 3 equal parts after trimming the ends.

Take about a litre of water, bring it to a boil, add a pinch of turmeric powder and a half tsp of salt.

Immerse the 3 pieces of vazhakkai and let it cook to half-done consistency. Cooking it soft will mush up the podimas. So extreme care should be taken to remove it from the hot water at the exact half-cooked time. This can be checked by inserting a pin or a knife.

Let the vazhakkai cool. Peel the skin. Grate the vazhakkai in a grater.

Take a pan, add about 2 tsp oil. When oil is hot, add 1tsp of mustard. When mustard pops, add 1/2 tsp urid dal and 1/2tsp chenna dal. Add 1 green chilli finely chopped. Add 1″ ginger finely grated. Add in a few curry leaves. Now add in the grated vazhakkai, sprinkle required amount of salt and mix well.

Add 1tbsp of grated coconut.

Switch off and squeeze a few drops of lemon juice.

Mix well and vazhakkai podimas is ready to serve.

Mutter Masala Rice

I don’t like to waste food. And to avoid repeating menu at the dinner tables, I sometimes twist the rice to make something more appealing to the eyes, as we eat with our eyes first.

The morning’s left over rice, got converted to Mutter Masala rice and presented like this with Gobi fry, it was a big hit at the dinner table.

Ingredients:
Left over cooked rice – 1 cup
Frozen Peas – 1 handful
Onion – 1 medium – thinly sliced
Cinnamon – 1/2″ stick
Bay leaf – 1
Cloves – 2
Saunf – 1/2 tsp
Turmeric powder – a pinch
Red chili powder – 1/2 tsp
Soya sauce – a few drops

Method:
– Take a pan, heat up 2 tsp of oil. Add Saunf, Cloves, Bay leaf and cinnamon stick.
– Add the sliced onions and fry well.  Then add the frozen peas, as it’ll cook quite fast.
– Sprinkle turmeric powder and red chili powder and mix well.
– When the peas is cooked, switch off heat.
– Now add the cooked left over rice, sprinkle salt to taste, soya sauce and mix well.
– Serve with Gobi fry or Potato fry and make your dinners more exciting.
– You can as well use it packing lunch with freshly made rice.

IMG-20150715-WA0007

Cheese Tomato Sandwich

Cheese Tomato Sandwich

Thinly slice 2 tomatoes into circles.
Take two slices of bread. Keep a cheese slice on it.
Sprinkle some oregano on it.
Stack the sliced circles of tomatoes on the bread.
Cover it with another cheese slice. Sprinkle oregano again.
Now cover with the other bread slice.

Toast on a buttered pan till golden brown. Delicious breakfast like this with coffee is to die for 🙂

IMG-20150701-WA0000

Veg Cheese Toast

VEG CHEESE TOAST

2015-06-27 07.19.50

Thinly slice one medium sized onion and half a capsicum.
Heat a pan with 1 tsp of oil, saute the onion and capsicum for a minute or two. Sprinkle little salt and sweet paprika for that flavor and color. Remove from heat.
Spread this saute-d veg mixture on one slice of the bread. Keep a cheese slice on top of it. Cover with the other slice.
Toast on a butter greased pan till golden brown.
Yummy Veg Cheese toast to gobble up is ready 🙂

Thakkalikkai Kootu

One of my most favorite dishes from my mom’s kitchen is this yummy Thakkalikkai Kootu.  Thakkalikkai is the raw tomato which is green in color.  It has a slight sour taste to it, as opposed to the sweetness of a ripe one.  Hence, this goes very well in the making of a kootu (tomato + dal) and absolutely goes well with rotis / phulkas, hot rice and pappad.

And this was the first dish which I cooked at my in-laws place, after getting married.

It was probably a month after my wedding. And my mother-in-law was totally in the mood to try out something new in the kitchen.

Being the new entry to the family, she asked me if I know any dish which was quite out of the ordinary everyday cooking. And I being a great fan of tomatoes answered instantly, that my mom used to make Thakkalikkai koottu (Green tomatoes in dal).

Now, my curious mother-in-law was all ears for the recipe. And she literally was watching me with keen eyes to see how I prepared it.

That was one of the proudest moments for me, to get a smiling approval from my mother-in-law, as she is a great cook herself.

It was a proud moment for me from another angle. All I had done at my home was observe my mom, while she cooked this dish. And when I tried making it in my in-laws house for the first time, it came out very well and it was like a big pat to my observation skills.

Ingredients:
Tomatoes – Green preferred – ½ kg (Cut each tomato into four quarters)
Moong Dal – ½ cup (Wash and Soak in water for 30 mins)
Onion – 2 (finely chopped)

Masala:
Red chillies – 6
Chana dal – 1 tsp
Coriander seeds (Dhaniya) – 2 tsp
Asafoetida – ½ tsp
Grated coconut – 2 tbsp

  • Cook the Moong dal in a Pressure Cooker with a little turmeric powder.
  • Fry the ingredients mentioned under masala, except the coconut, in one tsp of oil. Allow it to cool. Then grind them all to a fine paste.
  • In a heavy bottomed pan, add in a glass of water. When it comes to a boil, add in the cut green tomatoes. Let it cook and become soft. Add in the masala paste, the cooked moong dal and the right amount of salt. Let it all blend well and cook for 5 mins.
  • In another pan, heat 2 tsp of oil, add 1 tsp of mustard seeds, 1 tsp of broken urid dal, a few curry leaves and the finely chopped onions. Let the onions become lightly golden in color. Add this on top of the kootu and mix well.

thakkalikkai kootuDSCN0825I can assure you of its yumminess….just trust me and go ahead and try it. You’ll love it.

Indha kootu-kku naan guarantee 😀 😀


Karela Fry

This bitter-gourd fry is one hot favorite at home. Especially it goes well with Sambar rice or More kuzhambu rice. And its damn simple to prepare…ok…ok….may be you need a little patience during the frying stage 😛

Ingredients:
2 medium sized Bitter-gourd – Sliced in circles and de-seeded
Besan (Chickpea flour) – 2 tbsp
Red chilli powder – 2 tsp
Turmeric powder – 1/2 tsp
Curd – 2 tbsp
Garam masala powder – 1/2 tsp
Salt to taste

Method:
– Mix all the ingredients listed above (except the bitter-gourd) to a fine paste with no lumps.
– Now add the sliced bitter-gourd pieces and mix well.
– Let this rest for about 30 mins.
– The curd and salt mixture will help to reduce the bitterness.
– Take a non-stick pan. Keep it on medium-heat. Spread a tsp of oil on the pan. Fry the bitter-gourd pieces separately as shown in the picture.  It might be a test on patience for you, but seriously the fruits of this venture are damn good.
– Shallow fry both the sides of the bitter-gourd to a golden brown. An occasional near black one might also taste good. Never mind 😀 😛

Karela Fry

Nutritious Stir-fry

Today morning, I woke up late. And on top of it, I had to pack lunch for my daughter. When I opened the fridge, I faced another one. A half capsicum, an onion, 2 spring onion sprigs and an egg. And I had a *facepalm* moment for a minute.

Then, everything brightened, as I smilingly faced the challenge to create something out of this to go with chapatis for lunch.

So, here you go, with what I did.

– Thinly slice 1 onion and add to a hot frying pan with 2 tsp of oil. Fry them till light brown.
– Add the half capsicum, thinly sliced to the pan and continue frying.
– In the meanwhile, soak some soya chunks in hot water for a minute or two. Then squeeze the water out and cut them into smaller pieces.
– Add this soya chunks to the pan. This gives volume to the stir fry.
– Season with salt and spice with red chilli powder.
– Move this stir-fry to a side in the pan and make a quick scramble with that one egg in that half-side of the pan. This way, the scramble will infuse the veggie taste to it.
– Now, mix them all well and finally add the spring onion sprig, finely chopped.
– Turn off heat and pack for lunch 😀
– A nutritious, simple, delicious lunch box dish is done within minutes ! Try it out….

DSCN0743